|
I love baking cookies in December. I'm the odd one in my family in that I prefer non-chocolate baked goods. Weird, I know. LOL Of all the cookies I bake, honey spice cookies are one of my favorites. I love the combination of honey, cinnamon, ginger, and cloves. They are so good!
I thought I'd share the recipe for those of you who might like to try baking them. If you do, I'd love to hear what you think. Honey Spice Cookies 1 cup brown sugar, packed 3/4 cup shortening (I use coconut oil) 1/4 cup honey or dark corn syrup 1 egg 2 1/4 cups flour 1 1/2 tsp. baking soda 1 tsp. ginger 1/2 tsp. cinnamon 1/2 tsp. salt 1/4 tsp. cloves ~ Cream brown sugar and shortening in a mixing bowl ~ Add egg and honey or corn syrup and mix well ~ Combine all the dry ingredients in a second bowl ~ Stir the dry ingredients into the sugar mixture until well blended ~ Shape into balls ~ Fill a small bowl with water and another with sugar (I like using raw Turbinado sugar because it's courser) ~ Dip half the ball in water, then in the sugar ~ Place on an ungreased cookie sheet sugar side up ~ Bake at 350'F for 12-15 minutes Makes about 2 dozen Enjoy!
0 Comments
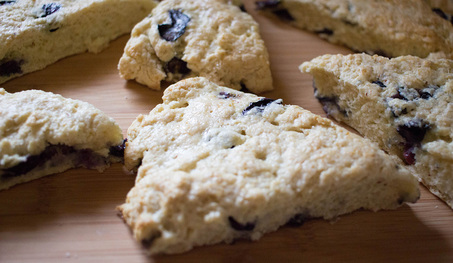
Scones are one of my favorite pastries, and something I rarely have the opportunity to eat. I found a recipe in my Betty Crocker cookbook a couple of years ago and got up the courage to give it a try. To my surprise, the scones turned out amazing and I'm pretty sure we finished that first batch in one day. We bought some blueberries the other day and I knew I had to put them in a batch of scones. I hadn't made them in over a year. The recipe uses half-and-half, something I buy specifically for this recipe, and I rarely think of it ahead of time. This time, I put it on the grocery list and got a package of the individual packets you find down the coffee aisle so I could have some in the cabinet instead of watching it expire in the fridge. lol Okay, enough about that. Here's the recipe so you can make some scones for yourself: 1 3/4 cups all-purpose flour 3 tablespoons sugar 2 1/2 teaspoons baking powder 1/2 teaspoon salt (I leave this out) 1/3 cup firm butter or stick margarine 1 large egg, beaten 1/2 cup raisins, blueberries, strawberries, etc. 4 to 6 tablespoons half-and-half Additional half-and-half Coarse sugar crystals (I use raw sugar) ~ Heat oven to 400' ~ Combine the flour, sugar, baking powder, and salt in a large bowl. Cut in butter. You can use a pastry blender, crisscrossing 2 knives, or I just use my hands. Stir in the egg, fruit, and just enough of the 4-6 tablespoons half-and-half so dough leaves the side of the bowl. For me, that means 6 tablespoons, usually. ~ Place the dough on a lightly floured surface and gently roll it in flour to coat. Knead it lightly 10 times. At this point, I put a sheet of parchment paper on a cookie sheet. Put the dough on the parchment paper and pat it into an 8-inch circle. ~ Use a knife dipped in flour to cut the circle into 8 wedges. I also use a pizza slicer and that works nicely. ~ Brush the top with additional half-and-half then sprinkle the coarse sugar crystals over the top. ~ Bake 15-18 minutes until golden brown. Remove from the cookie sheet and carefully separate the wedges. Serve warm or keep in a covered container. If you want to try cinnamon, I used 3/4 teaspoons of it and that seemed to be about right. What other kinds of scones would you try? I've eaten orange cranberry, but I haven't made it myself. Cinnamon raisin sounds good, too. If you try something different, come back and share. I'd love to hear about it and get new ideas!
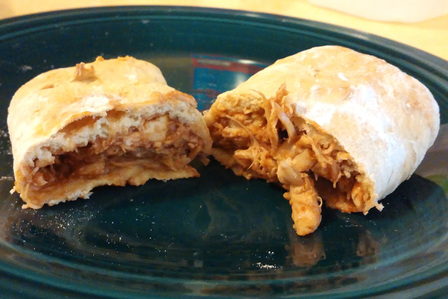
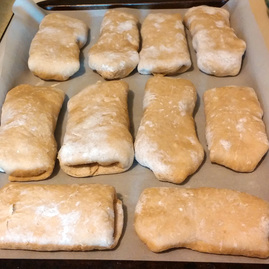
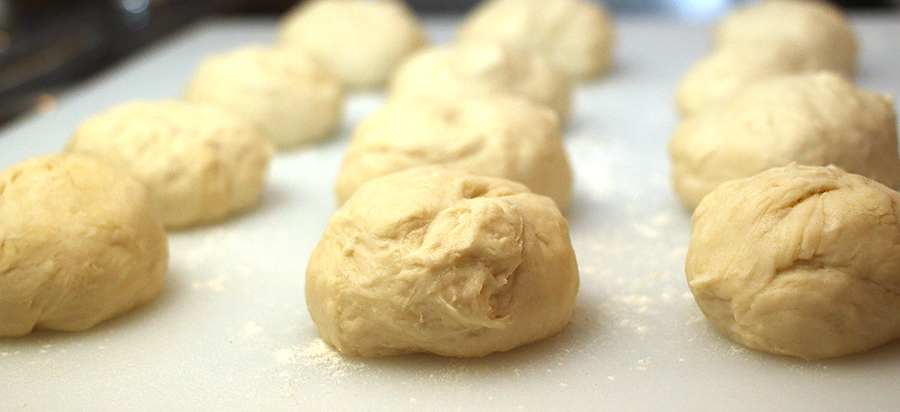
I've always enjoyed Hot Pockets, but with all the additives and high salt content, I started looking for a way to make them myself a few years ago. I found this recipe, gave it a try, and have made them many times since. The recipe is easy to adapt to include any fillings you want to use. This morning, I made some barbecue shredded chicken sandwiches for my husband. I've also made ham and cheese for myself. One of these times, I want to try bacon, egg, and cheese for breakfast sandwiches. I have no doubt that cheese and pepperoni would be great as well. Yum! To make ten sandwiches, I baked a whole chicken, removed the meat from the bones, and stirred in the barbecue sauce. I filled the sandwiches as full as I could and we didn't have any filling left. Here's the recipe I used after making some adaptations. Recipe and Directions: 3 cups flour (I used 1 cup wheat, 2 cups unbleached) 1/4 cup dry milk 1/4 cup sugar (I used raw) 2 1/2 tbsp yeast 1 cup warm water I put the warm water in a bowl, poured in the sugar, and stirred until dissolved. Then I added the yeast, allowing it to sit for two or three minutes. Meanwhile, I combined the flour and dry milk in another bowl just to have something to do while I waited. LOL Next, you'll want to add the dry mixture to the wet. Hand knead it well. I've always had to add an extra splash of water to this dough in order to get it mixed completely. This is a thick, sticky dough. 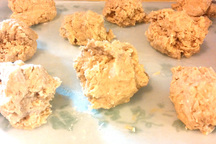 Small Confession: You know how there are some types of dough that are a joy to work with? Yeah, this isn't one of those. I'm not going to lie - it's a real pain. But trust me, it's worth it for the sandwiches. That said, I highly recommend having the filings prepared to make a double batch since you're going through the effort anyway. Back to the Directions: Divide the dough into 10 equal portions and place them on waxed paper. I then recommend covering them with a towel or something similar so they don't dry out as you roll out each one. At this point, put some parchment paper on your baking sheets or make sure you've greased them well. I roll the dough out on a piece of wax paper. You'll want to liberally sprinkle flour on the wax paper before placing each ball of dough there. I found I needed a new piece of the paper every third ball or so (or, you can get a bigger one and then fold it over to make it last longer). 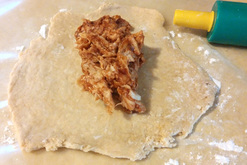 Filling the Sandwiches: Use a rolling pin to roll each ball into a triangle. Or as close to a triangle as you can. Mine tend to look a lot more like an oval. But hey, it works! If you notice the picture here, I use a Play-Doh rolling pin. I have tried many different ones in the past and this one has always worked best for me, so I confiscated it from the kids a while ago. One of the handles broke, so I should probably try and locate another. LOL Put enough filling to cover about a third of the flattened dough. Honestly, you'll just have to play with it a time or two until you see how much you'll need. And it can differ depending on what you're using for filling. Fold an end over the filling. Bring the sides to the center and overlap, pushing or pinching gently to join them. Finally, fold the last end over to seal the filling inside. Place seam down on your cookie sheet. Bake in a preheated 350'F oven for 15-20 minutes until lightly brown. These sandwiches freeze wonderfully. We've warmed them up in the oven as well as the microwave with great results. I hope you'll give the recipe a try!
I'm always on the lookout for a new soup recipe in the winter. This particular recipe is in a Better Homes and Gardens Slow-Cooker Meals book. I actually looked all over for this particular one online so I could just post a link to it on my Facebook page. I was unable to locate it anywhere. So I'll write the recipe out for you here and if any of you run into the link online, please let me know. Thank you! Chicken-and-Vegetable Bean Soup 1 cup dry Great Northern beans 6 cups water 1 cup chopped onion 1 medium fennel bulb, trimmed and cut into 1/2-inch pieces 2 medium carrots, chopped 2 gloves garlic, minced 2 tbsp snipped fresh parsley 1 tsp dried rosemary, crushed 1/4 tsp ground black papper 4 1/2 cups chicken broth 2 1/2 cups shredded or chopped cooked chicken 1 14 1/2 ounce can diced tomatoes, undrained 1. Rinse the beans and drain. In a large saucepan, combine beans and the water. Bring to a boil, reduce heat, and simmer uncovered for 10 minutes. Remove from heat. Cover and let it stand for 1 hour. Drain and rinse the beans. Or you can rinse the beans, place them in the water and put a lid on top of the pan. Then leave the beans to soak overnight. Drain and rinse the next morning.
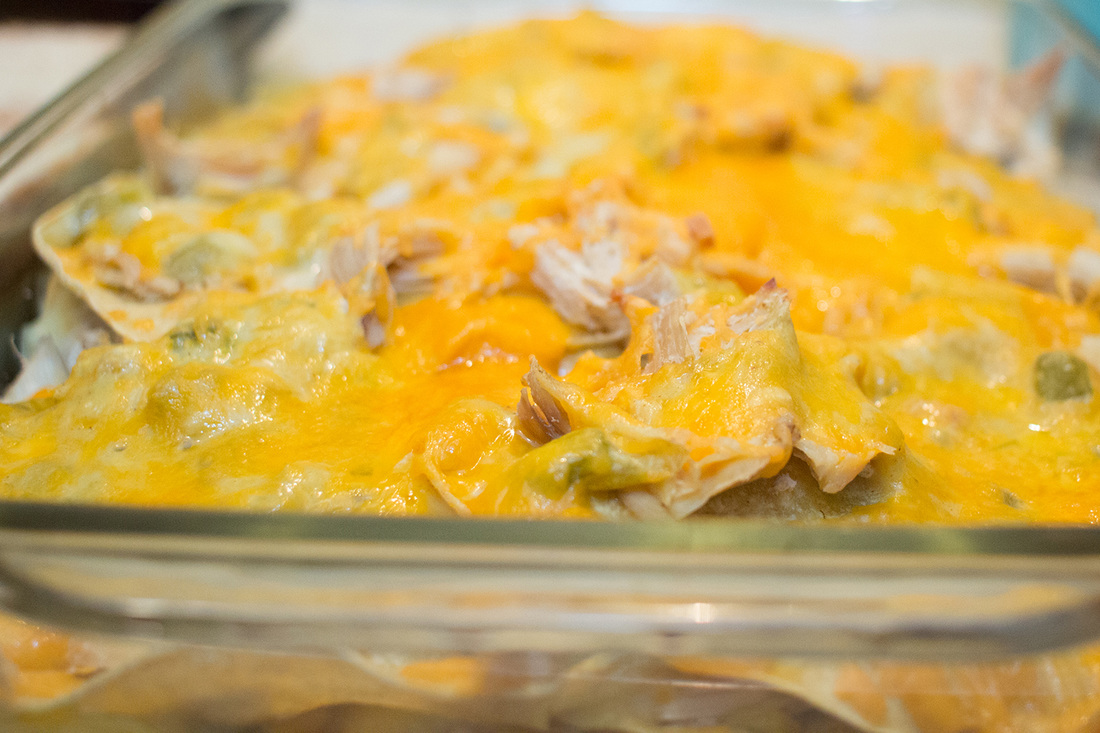
2. In a 3 1/2 to 5 quart slow cooker, combine onion, fennel, carrots, garlic, parsley, rosemary, and pepper. Place beans on top of the vegetables in the cooker. Pour broth over everything. 3. Cover and cook on low for 8 to 10 hours or on high for 4 to 5 hours. 4. Stir in the chicken and undrained tomatoes. Cover again. If you are using the low setting, turn it to high and allow it to cook 30 minutes more until everything is heated through. Serve with cornbread or another favorite side and enjoy! ** As a side comment, we've never added the fennel or the parsley. Celery is a great addition. We've also put in a can of tomatoes with chiles when we want some heat to the soup. It's a great recipe to play around with and add some of your family's favorite veggies. This soup rewarms nicely, too. This has been one of my favorite meals since I was a kid. This particular recipe is from my mom and I still absolutely love it. We made it last night and I thought I would share it with you all. This is a casserole that you can put together and toss into the fridge until you're ready to put it in the oven to cook. It freezes wonderfully as well. So without further ado: Chicken Enchilada Casserole Ingredients: 1 chicken (or 3 chicken breasts) 2 cans cream of chicken soup 2 (4 oz.) cans chopped green chiles (use one can if you don't like it spicy) 1/2 tsp. ground cumin 1/4 tsp. sage 1/4 tsp. powdered chili 1 diced onion (we use 1/2 tsp. onion powder) 1 lb. grated cheese 1 dozen corn tortillas Note: You can certainly make your own cream of chicken style soup and I've made my own corn tortillas. So it doesn't all have to be from a can. I do most of my cooking from scratch so when I make this dish every once in a while, I just go with the cans to give myself a break. lol  Directions: Salt and pepper the chicken and then bake. When it's tender, allow it to cool. Remove the meat from the bone (or skip this part if you baked chicken breasts) and break into bite-sized pieces. In one bowl, combine the soup, chicken stock from the baked chicken, green chiles, and seasoning. Stir together well and set it aside. If you use chopped onion, I usually stir it in with the chicken. At this point you'll have three ingredient bowls: that with the soup mix, the chicken (and onions, desired), and the cheese. Grease the casserole dish and layer the ingredients: Tortillas (3-4 per layer), chicken, soup mixture, cheese. Repeat these layers until everything has been used and top with extra cheese. Bake at 325'F for 35-45 minutes (it can take closer to an hour if you're pulling it out of the fridge). You'll know it's done with the sides are super bubbly. I hope you and your family enjoys this recipe! And a big thanks to my mom, Suzanne Allison, for the excellent recipe! I normally enjoy baking. But when it comes to the Christmas season, my specialty is cookies. I bake a lot of them and enjoy every minute. I usually have more cookies I want to make than I actually make simply because there's no way my family can eat them all. So I find myself having to narrow down what kinds I'll make each year. My husband's favorite cookie is the traditional chocolate chip. Mine is double chocolate with mint chips (which varies year to year depending on what mint candy is available in the store). Yum! But I thought I would share a couple of my favorite, slightly less common, cookie recipes. Coconut Cookies Ingredients: 2 cups flaked coconut 2 1/4 cups all-purpose flour 1/2 tsp. baking soda 1 tsp. salt (I always bake without the salt) 1 cup butter or margarine, softened 1 cup sugar 2 large eggs 2 tsp. vanilla extract Glaze (Optional - I rarely make it) 3 1/2 cups powdered sugar 1/2 cup hot water Directions: Heat over to 375'F Spread coconut on a baking sheet. Bake for 5 minutes, then stir every minute until toasted evenly. Let it cool. Mix flour and baking soda. Beat butter and sugar in a large bowl with an electric mixer until fluffy. Beat in the eggs and vanilla. On low speed, gradually beat in the flour mixture. By hand, stir in the toasted coconut. If the dough is super soft, chill for 30 minutes. Drop dough by rounded tablespoonfuls about 3 inches apart onto baking sheets. Bake 12-15 minutes until lightly browned. To make the glaze, stir together the powdered sugar and hot water until smooth. Add hot water if too thick. Drop a hot cookie into the glaze, using a fork to flip it over if you want glaze on both sides. Makes about 36 cookies. Peppermint Cookies Ingredients: 1 1/2 cups all-purpose flour 1 1/2 cups quick-cooking oatmeal 3/4 crushed peppermints 1/2 tsp. baking soda 3/4 tsp. salt 1 cup butter or margarine, softened 2 large eggs 1 cup brown sugar, packed Glaze (the cookies are great with and without it) 1 1/2 cups powdered sugar 2-3 tbsp. milk 1/2 tsp. peppermint extract 1-2 drops red food coloring if desired Directions: Pre-heat the oven to 350'F Lightly grease a baking sheet or use parchment paper ** Mix flour, oats, candy, and baking soda. Beat butter and brown sugar until fluffy. Beat in eggs. On low speed, gradually beat in flour mixture. Drop onto baking sheets by rounded spoonfuls. Bake 8-10 minutes until lightly browned. ** These are incredibly yummy, but I've personally started to bake them in a pan and then cut them into squares instead of trying to make cookies as they tend to really flatten out and stick together easily which makes storage difficult. Gingerbread Cookies This is a new recipe from last year and we loved it. In fact, we ended up making two batches last Christmas and when I started to talk about cookies the other day, this was the first recipe my daughter brought up. They are moist and just slightly chewy. So good! Ingredients: 3 cups all-purpose flour 1 1/2 tsp. baking powder 3/4 tsp. baking soda 1/2 tsp. salt 1 tbsp. ground ginger 1 3/4 tsp. ground cinnamon 1/4 tsp. ground cloves 6 tbsp. unsalted butter 3/4 cup dark brown sugar 1 large egg 1/2 cup molasses 2 tsp. vanilla Directions: Pre-heat oven to 375'F Line baking sheets with parchment paper In a small bowl, whisk together flour, baking powder, baking soda, ginger, cinnamon, and cloves. In a large bowl, beat butter, brown sugar, and egg until well blended. Add molasses and vanilla, mixing well. Gradually stir in all dry ingredients and blend until smooth. Divide the dough in half and wrap each half in plastic. Let it stand at room temperature for at least 2 hours. (The dough can be stored in the fridge for up to 4 days). Place one of the halves on a floured surface. Use additional flour on the dough and the rolling pin. Roll it out to 1/4-inch thick and cut out the cookies with a cookie cutter. Space the cookies 1 1/2 inches apart. Bake for 7-10 minutes (the lower the time, the softer the cookies) Don't remove them from the pan too quickly or they'll fall apart. If you need the cookie sheet to keep baking, you can drag the parchment paper from it and to a surface to allow the cookies to cool and that works well. I hope you give these recipes a try. If you do, let me know what you think. Do you have a favorite cookie recipe? Feel free to share, I'm always on the lookout for new ones!
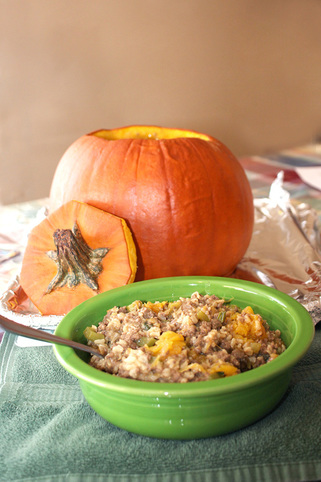
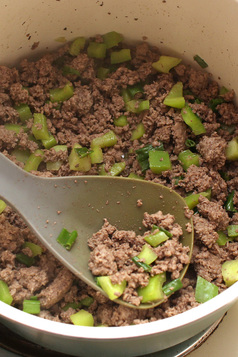
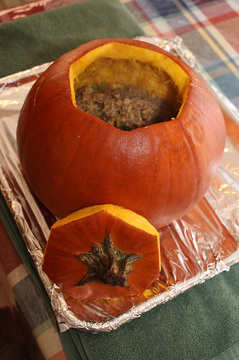
Happy baking! I love seasonal recipes! I got this particular recipe from my mom. I remember watching her make it a few times when I was a kid and loving it. Plus, there's just something memorable and cool about eating dinner that was baked in a pumpkin. I try to make this for my own family once a year - usually in October when it's easier to find pumpkins the right size. It's become a fun family tradition. Dinner in a Pumpkin Preheat the oven to 375'F Make sure you move the rack to the lowest setting 1 medium pumpkin 2 lbs. ground beef 1/3 cup chopped onion 1/3 cup chopped bell pepper 1/2 tsp. salt 1/4 cup soy sauce 2 tsp. brown sugar 1 can cream of chicken soup 2 cups hot cooked rice Cut the top of the pumpkin around the stem. Keep the top and discard the insides (or save the seeds to roast later). Brown the ground beef and drain the fat. Add the veggies and cook them until tender. Remove from heat and stir in the other ingredients. Spoon the mixture into the pumpkin. Replace the top. Lightly grease the center of a baking sheet or cover it with aluminum foil. Bake 1 hour until the pumpkin is tender. Scoop everything out of the pumpkin and enjoy! Personal notes: This recipe has room for a lot of variation. We use green onion, a cup of bell pepper, no added salt, and brown rice. Celery would also be a yummy addition. If you decide to make this for your own family, I'd enjoy hearing from you!
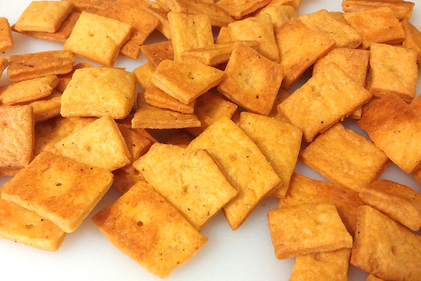
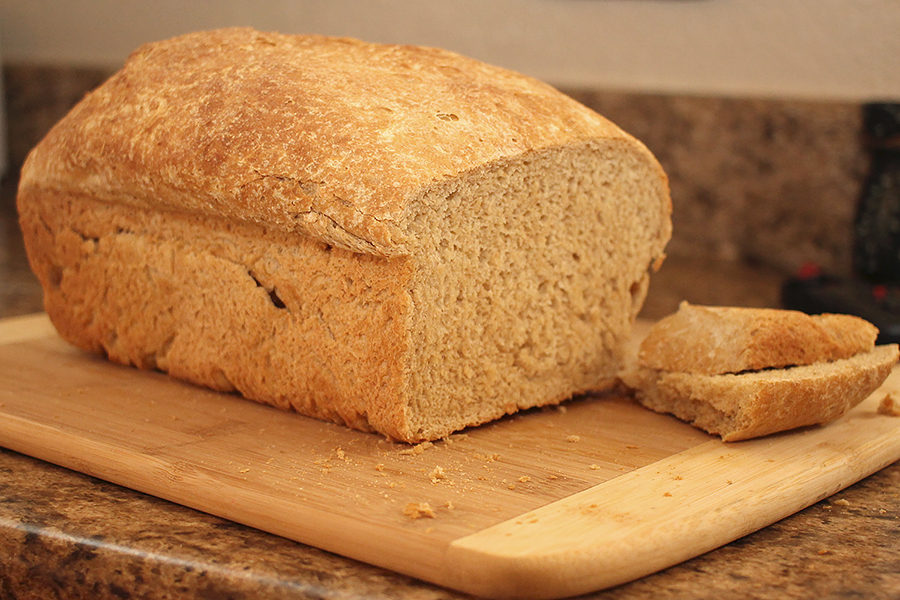
Today, my son and I took a break from school and made some Cheez-Its. Now, I've used this recipe before but it's been at least five years ago and I couldn't remember how it turned out. I will also state that this is NOT my recipe. I got this online somewhere and printed it. I can't find the link. So if someone knows where this recipe comes from, please let me know and I'll be more than happy to give credit to that person immediately. Homemade Cheez-Its: 2 cups sharp cheddar cheese, grated 3/4 cup flour, plus more for dusting 4 tbsp. butter, softened and cut up 1/2 tsp. salt (or 1 tsp. if you use unsalted butter) 1/2 tsp. ground pepper 1 tbsp. whole milk Preheat the oven to 350'F In a food processor (or a good blender), combine the cheese, butter, flour, salt and pepper in five-second pulses until the mixture resembles coarse crumbs. Add the milk and process until the dough forms a ball. In my case, I used a blender and I processed it for about 20 seconds and then took it out and kneaded it for a minute or two. It felt just like play-dough and it was good to go at that point. On a lightly floured surface using a rolling pin (mine is plastic) roll the dough into a rectangle approximately 1/16" thick. In my case, I eyeballed it and used my pizza slicer to slice the crackers into almost squares. If you want to be precise, you're welcome to use a cookie cutter. I've also read you can use a serrated fondant cutter to make it look more like the original crackers. I personally placed the crackers on parchment paper to bake. Poke holes in the middle with a toothpick if desired. You can also lightly sprinkle more salt on the top if you want to. Bake the crackers on the middle rack for 15 minutes or until the ends are beginning to brown. Once I pulled the pan from the oven, I immediately removed the crackers from the parchment paper onto a dry surface to cool. If you leave them on the baking sheet to cool, you might want to remove them from the oven just a little earlier as they will darken a bit more as they cool since the cookie sheet is so hot. 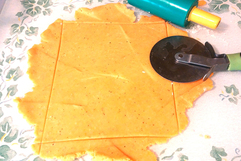 Verdict: The texture of these crackers is fantastic. I find it's a bit too sharp for me personally and next time may go with mild cheddar just to see how it turns out. Our son, who is a huge Cheez-Its fan, seems to think they are a little too sharp as well. We also tend to eat very low salt, and I thought 1 tsp. of salt (we used unsalted butter) was a little too much. I will stick with unsalted butter and 1/2 tsp. salt next time. They are easy to make and the dough is wonderful to work with. I'll definitely be trying this recipe again in the future! I've been trying different homemade bread recipes for a while, but have really struggled with it being too dense. A friend, who has figured out how to make some fantastic wheat bread, helped me with some changes to my recipe. Monday, I took her suggestions and was thrilled when I pulled a loaf out of the oven that looked perfect! I'm so excited to finally have a fluffy, homemade bread to make for my family!
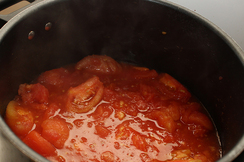
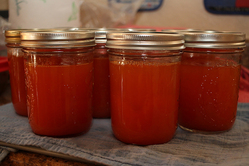
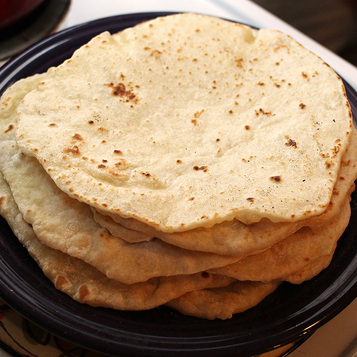
I've also been canning, but it's mostly spaghetti sauce and different kinds of beans (especially pinto and black). I've been wanting to learn how to can some other food as well so we bought twenty pounds of tomatoes, twenty pounds of apples, and forty pounds of potatoes. We started out the week with tomatoes. The kids and I washed all twenty pounds of them and went through the process, resulting in canning the tomato sauce in pints. It took a lot longer than I expected it to, but we had fun and it was a great learning experience. Yesterday, we tackled the apples. By the time we got through the weekend, we had fifteen pounds of them. We ended up with six quarts of regular applesauce and one quart of spiced applesauce. Yum! At this point, I'm going to wait until Monday to can diced tomatoes. I think I need a break. lol Due to some health issues in our family, we have been eating low-sodium foods for a while now. I searched for recipes to make homemade tortillas because 13-15% of the daily value of sodium per tortilla bought at the store seemed like a lot. I found this recipe somewhere, jotted it down, and have loved it ever since. I can't tell you where I first found it, so if someone recognizes it, please let me know and I'll be sure to give proper credit for the recipe. I will tell you that it took some practice for me - probably six batches - before they started turning out the way I wanted them to. I'm going to pass along some tips that will hopefully help you to make a batch that is just right the first time. :-) Ingredients: 3 cups all-purpose flour 2 teaspoons baking powder 1 teaspoon salt * 6 tablespoons coconut oil (or you can use lard or vegetable shortening) 1 1/4 cups warm water * I eliminate salt altogether when I make these and they turn out great 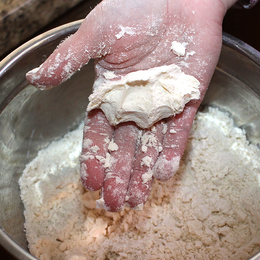 In a large bowl, blend together the flour, baking powder, and salt. Add the coconut oil (or alternative). If you have a pastry cutter/blender, then use that. Otherwise, you can do what I do and use your hands. Mix it all really well - you're going to eventually make it so the ingredients cling together a bit and hold a slight form when squeezed in your hand. If it crumbles, you do not have the shortening mixed in well. If it turns into a hard clump, you need more flour. With the amounts above, I've not had trouble with either, though. 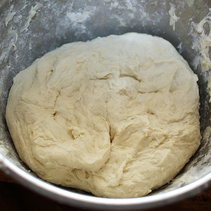 Add the water all at once and mix the dough quickly by hand until the dough forms a mass. It starts out really sticky. Work the dough in the bowl, moving it around the sides to pick up any flour remaining in the bowl. Knead the dough by folding it in half, pushing it down, and folding again. If it stays too sticky, you can sprinkle some extra flour on it. It usually takes about a dozen folds or so to form a soft dough that is no longer sticky. Cover the dough with a towel or plastic wrap and let it rest for 15 minutes. Sprinkle flour liberally on the surface you plan to use. I choose a large cutting board so I can move it around just because it makes things easier. Divide the dough into fourths. Then divide each of those into three pieces. Form them into a ball and place on the floured surfaced, creating a total of twelve dough balls. Cover them with plastic wrap and let them sit for 15 minutes. The original recipe did not call for that and I found them very difficult to roll out. They would spring back and it was frustrating. If you let them sit for 15 minutes, they are a breeze to work with. 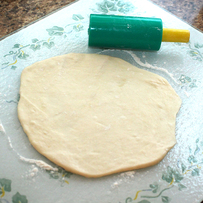 Put a skillet on your stove and set the heat for medium. While that's heating up, you can roll out your first tortilla. Yes - that rolling pin you see in the picture is from a Play-Doh set. I love it and have yet to find another I like better for tortillas, even with one of the handles broken off. LOL Now, you're making these by hand so you can't expect perfectly round tortillas. But if you start rolling from the center out in each direction, you can get pretty close. And trust me, you'll want to sprinkle flour liberally on the surface beneath your tortilla before you roll these out or you'll have a really hard time picking them up. Once you have it rolled out, go ahead and pick it up. If you've used enough flour underneath, you shouldn't have too hard of a time. The faster you pick it up, the less time it has for the shape to change as it's stretched. Lay it in the skillet. At this point, go ahead and roll out another tortilla while the first side is cooking. 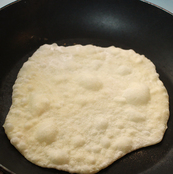 You'll know it's time to flip the tortilla when you see large bubbles starting to form on the side facing you. When that happens, flip the tortilla (they don't stick, except for maybe the first one, and that's rare). Cook on the other side just as long (and feel free take peeks at the underside to make sure it isn't overcooking). When you feel like it's done, place it on a plate and toss the next tortilla in the skillet. That's all there is to it! You'll get faster and more confident as you make them. And don't worry - occasionally one will get burned. It happens to me. With two dogs and two kids running around, I almost always have one tortilla that gets left on the skillet way too long. The dogs usually get to eat it, and I'm starting to wonder if they conspire to distract me to make sure that's the case every time. LOL Feel free to post any questions you might have. Once you make these, you won't want to buy them from the store again. These are, by far, our favorite tortillas and even the kids look forward to eating them. Chocolate chip cookies have been a favorite in our household for a long time. Over the last couple of years, I've slowly been changing up the recipe in an attempt to make it as healthy as possible. We are all very happy with this recipe and prefer these cookies to any other we've tried now.
I do not add salt (I use salted real butter, so that's enough for us). I have also replaced eggs with ground flax seed - 3 tbsp. of water and 1 tbsp. ground flax seed per egg. I reduced both types of sugars in this recipe to 1/2 a cup each instead of 3/4 so that's why I've only used 4 tbsp. water - I don't need as much liquid. I hope that makes sense. We've already made one batch of these and I will probably make another before the end of the holiday season. Enjoy! Nearly Healthy Chocolate Chip Cookies Preheat Oven to 350'F 1 cup all-purpose flour 1 1/4 cup wheat flour 1 tsp. baking soda 1/2 cup real butter, softened 1/2 cup coconut oil, softened 1/2 cup raw sugar 1/2 cup packed brown sugar (raw sugar plus 1/2 - 1 tsp molasses) 1 tsp. vanilla 2 tbsp. ground flax seed 4 tbsp. water 1 1/2 cups chocolate chips
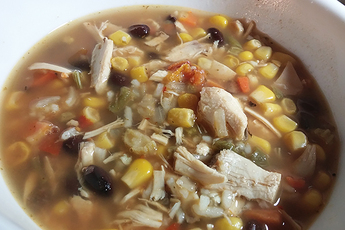
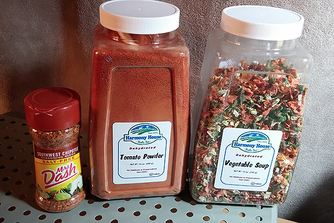
* If you want double chocolate chip, substitute 1/4 cup of the wheat flour with 1/4 cup Hershey's Unsweetened Cocoa (special dark is healthier!). * This works for any of the different morsels you can buy, including the new DelightFulls from Nestle Toll House! It has been unseasonably cold here in West Texas. There may be a lot of things about cold weather that I don't care for. But there are also a lot of things I like - and being able to make lots of soups is one of them! I prefer to use fresh ingredients whenever I can, but it's not always easy. Our family also camps a lot so I have been trying to put together some recipes that would be easy to make away from home. Let me introduce you to my Spicy Western Soup! Nothing in this has to be refrigerated and so it would be easy to make a batch of this soup over a campfire. The clove of garlic can easily be substituted with garlic powder or garlic salt. I'm including a picture of the two dehydrated ingredients I used along with the spices. The result is a soup that is thick and hearty. Crumbled tortilla chips would be really good sprinkled over the top, too! With bread to go with it, this recipe will easily feed 4-5 adults. Spicy Western Soup
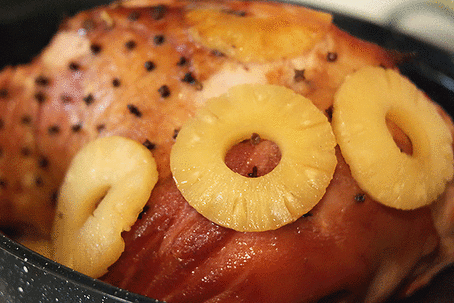
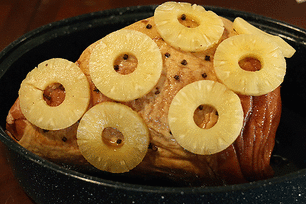
6 cups water 1/3 cup dehydrated veggies 1 can of corn (drained) 1 can (or pint jar in our case) black beans (drained) 1 tbsp. tomato powder 1 clove of garlic - minced Pepper to taste 2 tsp Mrs. Dash Southwest Chipotle 1/2 cup instant rice (dry) 2 - 5 oz. cans of chicken in water (or I use 2 1/4 cups diced chicken if I don't need it to be canned) Note: For dietary reasons, we keep things light on the salt. Feel free to add salt to the recipe if you would like to. Pour the water in a large pan and add the dried veggies. Bring to a boil and allow those veggies to simmer for at least 15 minutes. Add the tomato powder, minced garlic, pepper, and Mrs. Dash Southwest Chipotle and simmer for another 5 or 10 minutes. Add the corn, black beans, chicken, and rice. Boil for another 5-8 minutes. Turn the heat off and let the soup sit for about 10 minutes to allow the rice to cook. Note: If you're in a hurry, you can add the corn, black beans, chicken, and rice at the same time as the tomato powder and spices. Enjoy! If you try this recipe, let me know what you think! I would love to hear of any changes you might have made to the soup as well. Stay warm out there! I have a lot of recipes that I love when it comes to the Christmas season. I'll be sharing them regularly with you all as the next month and a half passes. But my favorite recipe is my Dad's baked ham - his favorite part of every Christmas meal. As far back as I can remember, my dad baked a ham for Christmas. I remember helping him as a child, pushing the whole cloves into the surface of the ham. Then I helped him hang the pineapple rings off the cloves so that the whole ham was covered in them. What I remember the most, however, is the smell that wafted from the oven. The ham would bake for hours as the scents of pineapple, cloves, and brown sugar danced through the house. Periodically, my dad would take the ham out and baste it before carefully placing it back in to bake a little longer. My dad passed away in November of 2011. The smell of cloves, especially, will always remind me of him. Once my husband and I got married, I baked a ham every Christmas just like my dad taught me. Keeping that tradition is important to me. Now our kids help me push those cloves into the ham and comment about how yummy the combination of pineapple juice and brown sugar smells. As we work together, I tell them about how I helped my daddy do this very thing when I was a little girl. "This always makes me think about your Grandpa." I feel like this tradition helps bring a little of my dad into the Christmas celebration - a time of year that was always his favorite. Dad's Baked Ham
Preheat the oven to 325'F Ham (any size will work fine) Whole, dried cloves 20 oz. can of pineapple slices/rings 3 tsp. brown sugar Take your ham and place it in a roasting pan or glass dish that is large enough to hold it and the juice that will result from baking it. Push the whole cloves into the ham, all over the visible surface. Drain the pineapple juice from the can into a bowl. Stir in 3 tsp. brown sugar until the sugar has dissolved. Place the pineapple rings on the ham, hanging them from the cloves. Pour the pineapple juice and sugar mixture all over the ham. It will pool in the pan under the ham. Bake for 20 minutes for every 1 pound of ham. I usually try to take the ham out and baste it every hour or so until the ham is heated through. Once the ham is done, remove the cloves and throw them away. Serve the ham with the pineapple slices. I hope you enjoy this recipe. I also hope that, whatever traditions you have during the holiday season, you'll continue to make memories memories with your family. Those memories are worth their weight in gold. God bless! I wanted to share one of my favorite recipes - homemade refried beans. Now, let me start out by saying that this is NOT my recipe. I found it online, jotted it down, and then could never find it again. If someone does know of the original recipe, please tell me. I want to give that person credit here for some amazing refried beans.
I originally searched for a homemade refried bean recipe because I wanted to reduce both the salt and the fat content for our family. This recipe is perfect! If you prefer more salt, you can always add some. You can do these two different ways: Slow cooker and canning. The recipe I originally found is for the slow cooker. Crock Pot Refried Beans 3 cups of dry pinto beans (rinsed) 9 cups of water 1 3/4 tsp. pepper 1 tbsp. garlic powder 1 tsp. onion powder 1 tsp. garlic salt 1/8 tsp. ground cumin
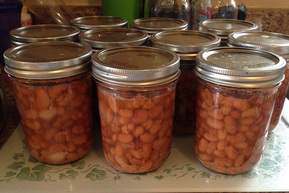
This makes a lot of refried beans. They freeze wonderfully and my family prefers them to any canned or restaurant refried beans now. Canning Refried Beans We have very limited freezer space and we started canning this year. I wanted to find out if I could can refried beans. Everything I've read said that they don't can well. Instead, you would fix the beans like you would for the slow cooker and can them at that point. Then, when you want refried beans, open a jar and mash them. I have canned beans like this once so far. I did have to add more than the 9 cups of water, but I used the same amount of seasonings. Next time I will probably try being a little more specific with my water to seasoning ratio. Even still, they taste really good, just not quite as seasoned. Up until last night, we typically open a jar of those beans that I canned and eat them that way. But last night, we were in the mood for refried beans. I poured them into a bowl and mashed them like I would right out of the slow cooker. They turned out perfectly! I will probably do this from now on as opposed to the slow cooker just because it frees up some of my freezer space. Either way - slow cooker or canning - you can't go wrong with this recipe. If you decide to give it a try, come back and let me know what you think! I just have to say that I'm thoroughly enjoying the cooler weather we've been experiencing lately. The highs are supposed to be in the 76-82'F range for highs and I'm most certainly not going to complain! Of course, now the reality of how close Halloween is getting has set in - and that only means that November and the rest of the holidays are hot on its heels.
Even though it's not cold here yet, I'm already looking forward to making soups this fall and winter. I love making big batches of soup either on the stove or in the crock pot. This last year, I've been learning how to can. My goal is to make big batches of soup, eat them for that meal, and can the rest. That way we can just open up a jar and have homemade soup whenever we're in the mood. This time of year also makes me think of a couple of recipes that I make - at most - once a year around this time. The first is a dessert - pumpkin bars with cream cheese icing. The other is dinner in a pumpkin. I thought I would share both recipes with all of you :-) Pumpkin Bars
Cream Cheese Frosting
Dinner in a Pumpkin
Follow me on BlogLovin' Yes, I do! I enjoy baking a lot. I regularly make cookies and breads from scratch.
I've had several comments from readers about a part in Calming the Storm where Rachel is making an apple crisp. People have told me that it sounds like I bake in real life. One reader even suggested that I include a recipe in my books. I thought this was a really neat idea, and I have decided to do just that. I did go back and add Rachel's Apple Crisp recipe to the Kindle version of Calming the Storm. But I wanted to post that recipe for those of you who already have copies of the book, just in case you want to try it out for yourselves. I make this apple crisp regularly and it is so yummy! You can also follow this recipe and substitute peaches, pears, and berries. If you use any canned fruit, drain it, pour it in, and directly stir the cinnamon into that rather than add any water. That extra juice will compensate and you don't want the dessert to get too soggy! I originally got this recipe from my sweet mom, who received the recipe from her mom. Without them, we would not have apple crisp at our home and I'm pretty sure it would be missed terribly! Calming the Storm Rachel’s Apple Crisp Recipe
Okay, so it's famous in my house. That counts for something, right? ;-)
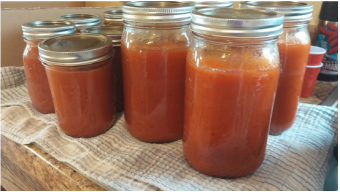
I have a large pressure canner and I'm slowly learning to can different foods - emphasis on the slowly. So far, I've canned spaghetti sauce, pinto beans and salsa. But the spaghetti sauce is a monthly project because we eat so much of it. Not only do we use it for actual spaghetti, but it's one of the few things that our son will eat. I can put it on bread for pizza bread and I can even hide other vitamins or nutrients in it. We can't live without our spaghetti sauce! Now, before I started this post, I was going to include the recipe. Then I realized something: I don't follow a specific recipe. I mix it a bit to taste. So I'll share my approximate recipe. But I think that, for those of you brave enough to give it a try, you'll really like it! First, a quick note about the tomato sauce we use. We buy the gigantic 106 oz. cans at Sams. I'm sure they are available at other locations as well. Spaghetti Sauce Recipe (Approximately)
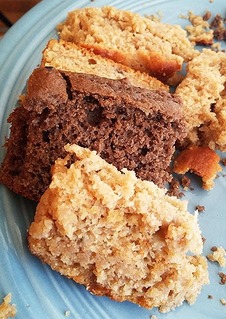
Combine everything and mix well. Bring the sauce to a boil. Once it is at a good boil, reduce to a simmer. Place a lid on the pot (or you'll be finding spaghetti drops on your walls and floors for weeks) and let it simmer for at least an hour. Two is better. Stir every 20 minutes or so. That's it! You can freeze big batches like this or can them. Either one works great. A batch like this lasts our family of four about a month. Very easy and so yummy! We had 9 or 10 bananas that were getting incredibly brown. These were some bananas that weren't fantastic when we bought them, so they just sat on the counter until they were way past their prime. Because I hate seeing any food to go waste, my daughter and I spent yesterday afternoon making banana bread.
We had enough of the batter to make a large loaf and three small loaves of regular banana bread and then a large loaf and four small loaves of chocolate banana bread. I especially love this bread right out of the oven with some butter melting on the top. Yum! Thankfully we had a get together with some friends last night so I was able to give away four of the small loaves. I left some out for breakfast the next couple of days and then froze the rest. I love being able to just reach into my freezer and pull out some banana bread when the mood strikes someone in the house! Are you hungry for banana bread yet? Let me share the recipe I have with you! For chocolate banana bread, use 1 3/4 cups of flour and 1/4 cup of baking cocoa powder instead of the 2 cups of flour. Enjoy! Banana Bread
|
ACFW Member
Archives
July 2023
Categories
All
|






 RSS Feed